Creating subdomain on hosting is simple and but many people find creating subdomain for blogger a little bit complex. Today i am giving you tips to create subdomain on blogger. For creating subdomain on blogger ,you need domain Cpanel and your domain provider should have DNS management.If you have hosting service then task is very easy.
Here is the three ways to create subdomain for blogger . Subdomain can be used for secondary purpose and used to create landing page for certain campaign or personal purposes like blog.yourdomain.com .Apart this you can Host subdomain on Blogger and WordPress both. For example www.prabhusoft.com.np has been hosted on blogger whereas blog.prabhusoft.com.np is hosted on WordPress platform.
1)Creating subdomain using Hosting plan
if you have hosting plan or a self hosted website, then you will have to create this CNAME Record with your Web Host. You might be able to do it from the “advance DNS zone editor” in most cPanels. If you don’t have such an option, contact your Web Host and ask them to create these two CNAME records for you.After creating this record with your web host(and after it has propagated), publish your BlogSpot blog to that subdomain(Skip the tutorials for CNAME Creation on Different domain Registrars. They are not applicable for Self-hosted Websites)
If you don’t have a self-hosted website, then to create the CNAME you need to login to your domain control panel. Different Registrars have different interfaces but the basic thing is that you need to create the CNAME Record. If you bought the domain via blogger, then you have to first login to Google APPS to get into your Domain Control panel(http://google.com/a/cpanel/)
A general procedure to edit CNAME records, Go to Domain Settings > Domain Names and click on Advanced DNS Settings.
CNAME Creation on Different Registrars:
i) Creating CNAME on Enom
1.Log into your Enom account(If you signed in from Google APPS, you can directly proceed to sep 4)
2. From the drop-down menu at the Domains tab, select My Domain and you will be directed to the Manage Domains page.
3. Click on your domain name
4. To add a CNAME record, click NEW ROW.
5.Enter blog as Host Name, ghs.google.com as Address and CNAME as Record Type
ii) Creating CNAME on Godaddy
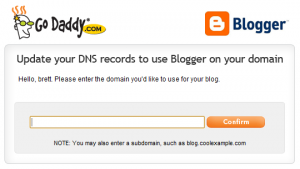
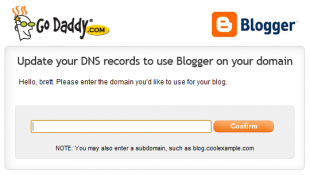
Godaddy has come up with a simple tool that will automatically create the CNAME records for you. So if you are on Godaddy users then just Go to this Go Daddy domain dashboard and click on domain name and add record.
Enter your Subdomain name there e.g.: blog.yourdomain.com
(Use the correct sub-domain where you want your blog to appear) and click on the Confirm Button. The CNAME Records have been created for you automatically.

iii) Creating CNAME on Name.com
1. Login to your Name Account
2. Click on Account and then on your Domain name
3. Click on DNS Management form the Right Sidebar and add the details as shown in the screenshot and Submit
![]()
iV) Creating CNAME on Namecheap.com
1. Login to your Namecheap account and click on your domain name.
2. From the Left Sidebar, Click on All Host Records
3. Add the Records
![]()
V)Creating CNAME on Afraid DNS
1.Login to your account
2. Click on subdomain
3. Choose CNAME (from Dropbox)
pic….
In this post, i have tried to cover all the information related to subdomain and CNAME creation of different register.If you have any problem then feel free to comment below. I will try to solve the problem as soon as possible.
